Sunday 4 December 2011

Another (better) experiment with Illustrator

So I've been messing around in illustrator again due to lack of service jobs at work... and so I came up with my bar of fu.
This is it:

Nothing particularly special, but possibly funny to those who understand user stupidity (where can I get one of there fu bars that all those computer technicians keep talking about?)

Thursday 10 November 2011

Fire for Engineers

A couple of weeks ago I did some fire twirling for the ANU Engineers Ball.
Heres one of the pics. it wasn't much use downloading and importing the rest of the pictures because while they would have been spectacular at the time, the photographers available were not as experienced as they could be at taking twirling shots.
This was the best one I could find.

Sunday 30 October 2011

Fire! Fire! Fire!

So I've been away for a while working on other projects and playing guitar, but I'm use starting to get back in, making things, being in pictures, taking pictures.
Sating for the time being is a photo that I set up and featured in. It was taken at a wedding (appropriate, one might say), however it was not mine, nor am I romantically involved with the other person in this photo (she's one of my friends sisters).
As far as what I have to say about this photo, I like the contrast of the silhouettes and the light bleeding over our chests. The set-up is symbolic of the warmth of the human heart, like space in all of us that just needs the right ingredients (fuel, heat, ignition) to light a fire and burn brightly.

Thursday 15 September 2011

I can now accept donations!

I now accept donations and, if anyone feels the need, commissions.
I can have almost all of my work printed, or remade etc.
All donations must be made in Bitcoins.

Wednesday 14 September 2011

Technological creativity and energy focused

Over the past couple of days I have felt compelled to upgrade, secure and generally improve my technological storage, communication and access. I have learned a great deal of things on my journey for privacy, security, ease of access, and full utility. Here is a list of the things that I have gained competency and understanding of and the methods of using this knowledge that I am now fluent in.
All my learning of these systems was done on my own experimentation on my OWN HARDWARE. My knowledge of these systems is purely for academic interest.
  • GnuPG or OpenPGP - secure communication, cryptography.
    • Creation of encryption keypairs.
    • Forming online "Web of Trust".
    • Encrypting/decrypting files and messages.
    • Effective security practices such as hidden external storage.
  • FreeNAS - storage
    • Network Accessed Storage.
    • Initial set-up.
    • Creation of RAID (Redundant Array of Independent Disks).
    • Initializing of central drive pool using ZFS (a disk filesystem designed by Sun Microsystems) which uses a Merkle Tree of checksums to maintain file integrity.
    • Set up of Apple Filing Protocol (AFP) to share files over the network and maintain privileges.
  • MySQL - information retrieval (my first little nit of naughtiness).
    • Basic MySQL injection.
    • Database retrieval request structure.
    • Website security scoping.
  • Metasploit - network penetration and security testing (started to go over to the dark side).
    • Installation of the Framework.
    • Vulnerability scanning.
    • Payload delivery.
    • Ethical use of high risk software.
  • Bitcoins - Online cryptocurrency
    • Block system used to make and validate purchases.
    • Block solving (mining) to create more currency.
    • Mining pools to make block solving more efficient.
    • Limited economy to control inflation.
    • Decentralized peer to peer purchases.
  • Edit: Wireless Encryption technology
    • Locating insecure networks.
    • Performing advanced diagnostics on encryption used.
    • Performing attacks on wireless systems to gain useful data.
    • Decryption of Unique IV's to gain WEP keys.
    • Performing dictionary and brute force attacks on WPA/WPA2 four way handshakes.
Soon I will go further into my experimentation with these topics, except for GnuPG.
Through this there are a number of projects that I would like to experiment further with and for specific reasons.

FreeNAS.
This FreeBSD based OS was recently updated to version 8.0.1 to include support for the latest version of ZFS, Zettabyte File System, however in the process of being updated, a number of features that the previous version (7.2) supported, such as a Bittorrent client, and UPnP AV. Hopefully I will become more competent with this OS when the next version (8.1) is released with these features, until then I will continue to use it on my fileserver.

MySQL injection.
I am just very curious in this method of illegitimately gaining information from webservers, as it can be very easily stopped however many system admins are lazy and don't screen the SQL commands so you cant use them.

Metasploit Framework.
Again this method of gaining access to a system makes me extremely curious. Being a framework of tools for tech savvy security specialists, its like giving the keys to a tank to an 11 year old boy. They will probably work very, very hard to learn how to drive that tank even though it will take them years and years. Just because its got so much power behind it.
When I want to learn more about this I am going to do so through an OS called BackTrack Linux. A platform with the Framework built in, specifically designed for network penetration.

Bitcoin.
I'm slowly investigating the efficacy of starting a Bitcoin mining operation, generate some more cash on the side while doing very very little. I believe this to be a very interesting concept, and regardless of the profitability of the venture it should be a worthwhile project considering security and other management and administration.

Edit:
Wireless Technology
I also recently became interested in the security of local WiFi networks. As it is, I have come to the conclusion that without above average technical know how, many ordinary people have no idea of the security (or lack thereof) in place on their network, and have absolutely no idea that they are vulnerable to local security threats. I did an analysis of the vulnerability of all the local networks in my area (of which there are many, and 40%-60% of the networks, are not only vulnerable to intrusion, but some of them were such blatantly easy targets that anyone given the willingness to do so, could learn to break the encryption used and gain access to their networks. However this was not my goal, my goal was to gain knowledge of this technique (knowledge can't get you arrested, or can it?) so I set up my own router to mimic the security level of these surrounding vulnerable networks, and proceeded to attempt to break into my own connection. It took me about 2-5 minutes each time I attempted to recover my "lost" key, depending on how much traffic was going through the router and how much interference there was on that particular channel (the place where I live has no wireless channels that don't have more than 2 networks on them already). I also tried setting up my router to use the highest level of encryption available to a home user. This cracking method is much more time and power consuming, as it involves using a program to generate keys that match a specific criteria and then pipe them through to another program which then hashes them against the 4 way handshake. Unfortunately for those of use who don't go to work and use a supercomputer every day, this method can take years to crack a single key as there is an incredibly large number of combinations as the minimum number of characters for a WPA password is 8 (I quickly gave up on trying to decrypt my key which was incredibly complex). However using a dictionary of known and commonly used passwords can be quite successful in recovering a lost password or gaining entry into a local wireless network.
I am now eagerly looking forward to the day when the processing power required to brute force a password such as this is publicly available.

These tools/skills are all invaluable to technically minded people living in a digital age, somewhat akin to knowing how to make a bow and arrow in ancient times. I think that mere knowledge of the existence of these tools is not enough, knowing that food exists and knowing how to find/cook it was an important factor in staying alive. Nowadays, food has been replaced by information and knowledge.

Wednesday 7 September 2011

First film post!

Me and a firetwirling friend of mine, Lukas Bola, have decided to start collaborating using his awesome skills with contact staff and my sort of awesome skills at filmography (mostly my ability to acquire the technology that we need). We ran this video through adobe after effects using multiple blended layers with an echo effect and modified colours.
This particular video was just a proof of concept (hence the reason why its only ~30 seconds long) and there will most likely be another video like this produced soon (once I have the time).
Enjoy.

Monday 5 September 2011

Drawing for great justice

I have decided that my sketching skills need improvement, so I've begun a series of mixed media illustrations with a particular theme around each.
One will be organic, drawn and modified using illustrator..
One will be digital, drawn and photoshopped.
One will be mechanical, either drawn and photoshopped or built, photographed and drawn.
One will be musical, photographed and drawn.
One will be abstract, and I haven't worked out how I'm going to do this one yet.

This is a photo of the first illustration: Organic
It still needs to be scanned in and imported into illustrator however I don't have a scanner available to me at the moment.

Edit: This is the next drawing in the series. Its unfinished because its just a frame for digital media. Again this still needs to be scanned into illustrator for some edits, and putting the main feature inside the frame.

Thursday 1 September 2011

Started working with Illustrator

I decided recently that I should become more familiar with Illustrator, so I started a small project to trace a photo into illustrator, use Illustrator to manipulate the vector based graphic, and then import the project into Photoshop and apply some more aesthetic effects.
I wanted to keep some things from the original image tied in with the theme. As most of the shoot had some form of mirror in it, I thought it might be nice to get a "Through the Looking Glass" style theme, the other aspects of personality coming through reflection.
This is the final:


The model used for this was a good friend of mine called Robyn, (I've used her for some previous works before). Hopefully I'll be able to organise a time to do some more photography, so I can do some more stuff like this. Possibly even some 3d stuff. 
This is the only source photo for this project:

Monday 29 August 2011

Experiments with brushes

I recently found a tutorial that had some elements that I wanted to use for a couple of photos that I wanted to edit in specific ways. While not entirely ideal this is a rough copy which was just used as an experiment to get comfortable with this technique.
The technique used is outlined here.


 Edit: Here are some more experiments with different brushes


Sunday 7 August 2011

Resume

So I felt that my current resume was too full of useless junk that didn't really matter and which I couldn't really use and that it was extremely bland and not eye catching at all.
I decided to redesign it, in a graphical sense, because it will make it more eye catching, have less useless information to read through to get to the important bits and hence give me more of an edge for getting a job.

A friend gave me a photo

One of my friends gave me a photo the other day and asked whether it would be of any use for my blog as she knew that I was creating one. I said "Ok I'll see what I can do with it". Lo and behold that night I'm unable to create anything that I'm really happy with at all. Nothing I do seems to make any sense with relevance to the result that I want to produce.
It just didn't work.
I went to bed dissatisfied and rather unhappy that I couldn't do anything with the (admittedly) great angle that the photo had.
About a week later I'm folding through some resources (textures, bumpmaps, fonts etc.) and I come across one that I know I need for something, so I sift through my folder of unfinished projects and random spare stock images, and find the extracted photo of my friend. About 2 hours later I had a project that used the image that I was asked that I was happy with:
Here is the source photo that she gave me to use:

Friday 29 July 2011

Fan Art/Tutorial Project

I'd been toying with the idea of making some fan art for a particular Xbox 360 game that me and my gamer friend really like. So I decided to make a fan art poster for the game. The game is called Portal 2. This poster quotes a line from a song included at the end of the game with the name of the fictional scientific organisation, Aperture Science.
I used some stock images for the gritty paper background and images from the game to create this, I also used a free font called Kremlin.
Most of the creation was basic layers and a little bit of other stuff.
For this project I learned how to render and manipulate clouds to create a dirty poster effect (I also used this to enhance the effect of the Zoloft Face Facts poster).
This was originally a project to a tutorial which I followed and then added extra stuff to.

Saturday 23 July 2011

Sin City - Portal spoof/crossover

I felt like creating something that was a spoof of something in the style of something else.
So I went about selecting two things of moderate importance to me (I didn't want to do a big project of huge proportions). At first I was going to do a constructivist propaganda poster for The Lord of the Rings but then I decided that I couldn't find enough quality images to use online, so I thought I might crossover Portal and Sin City (because GLaDOS is a massive gangster, and totally belongs in Sin City).
So I found a high resolution picture of GLaDOS, desaturated it, messed around with the levels in Photoshop, added some motion blurred monochrome white noise for rain effects (a couple of times with different blending options for different layers of rain).
Cut and replaced some colours from the original picture for a touch of Tarantino red.
And finally added a relevant Sin City quote.
This is the final:
This is a previous version that I think is more aesthetically pleasing however it does not fit with the darker Sin-City-esque styling that I wanted for the final.

Wednesday 20 July 2011

Spoof Poster

So I was walking along the other day, and I see an Ecstasy, Face Facts poster at a bus stop. It tells me that my Ecstasy is made using drain cleaner, battery acid and even hair bleach! Sacrebleu! I didn't think that my dealer was trying to kill me!
Then I thought, what about pharma companies? They have almost always been shown to be more insidious than street drug dealers in their tactics to gain and keep customers, do they even use the same chemicals to produce their drugs?
The answer I (eventually) found was yes, in fact, they do.
While pharmaceutical companies are less than likely about to post recipes on how to cook up Zoloft or Paxil at home, I found a short article on decreasing the ecological impact of manufacturing the drug Zoloft (Sertraline), which listed a number of chemicals required for the creation of this drug. These were namely HCl (or hydrochloric acid), NaOH (lye), Titanium Tetrachloride (a volatile metal Halide) and Palladium.
"NaOH is used in drain cleaner!" I shouted. "HCl is an acid that is incredibly toxic and used as a household cleaner! Isn't Titanium a heavy metal?"
So I made this poster, and I'll probably make more
I have tried to replicate the original Ecstasy. Face Facts poster as closely as possible with a few minor tweaks so I can't get into too much trouble.
edit: 
I modified this to look a bit more gritty and so that the catch stands out a bit more. I just added a couple of layers of green and blue around the edges and a layer of light blue fog to burn.

New Track!

So this track isn't actually new, its actually from a long time ago. This track was from me wanting to create a track using entirely guitar sounds. They have all been recorded onto a computer and then sequenced.
This is also the first time I'm going to try and embed the player.
Rumpolacktra

Fire!

So heres some more fire pics that I haven't posted yet. These aren't as good quality as some that have already been posted but they are still worthy of mention.

Tuesday 19 July 2011

More Bed photos

So, after a little hiatus again here comes more info about the bed.
After cutting out of the joints, bolting wood together and final assembly I came to the conclusion that the bed was much too high to actually be of any practical use to anyone. So I cut about a foot off each leg.
I also began work on the aesthetic value of the bed adding various elements to increase it.
Measuring out joints to be cut

Finished half joint to be assembled

Another finished Joint

Markings for joint to be cut

How the joint will be assembled once cut


Joint just after it has been cut but wood hasn't been removed


Removing wood from joint

Legs/uprights in their finished state

Platform/base (also in its finished state)


Complete! (with no aesthetic additions)


One of the additions I have made

Sunday 10 July 2011

Remix of an album cover

A while ago I decided to remake a Crystal Method album cover and this was what I came up with after about 20 minutes in the GIMP, with no training and lots of sleep deprivation.

Edit:
I have decided to add to this as I realised no-one would be able to tell what album it was or by whom.

Edit:
I decided that an album cover isn't much without some bangin' (excuse my french) artwork on the CD. So here's a bit of that to go with my bit of this.

Bed pictures

This construction is as yet aesthetically incomplete, however, as it evolves I will upload more pictures.
This project began as a necessity as my living situations changed in such a way that I needed my own bed, I wanted something large enough that I wouldn't feel displaced, going from sleeping almost exclusively in double beds, however it needed to be small enough that it would accommodate our already space starved apartment. It needed to be strong enough to support more than 2 people at once, infrequently, so that we could use it as a second lounge part time.
I remembered the bed I had as a child (A bunk bed, with the bottom bunk largely unoccupied) and thought: "There's no reason we cant have it above our current lounge, it would probably serve us better."
I went searching through furniture stores searching for a large loft bed, to no avail. All the stores seem to only have single loft beds, or double beds with a single bunk above.
Online I found a few however they were all way out of a students price range (and some unable to be shipped to "the land down under")
So I decided that it couldn't be that hard to build a bed and started thinking about plans. I looked online for plans (again, found some, no king singles), and went right ahead and used my own anyway.
I drew up basic necessities for it, (approx 106cm x 203cm), a tray not slats for extra support, leg lengths (I originally went with 180cm which turned out to be too tall), support for the tray, and which joins to use where.
The basic raw materials list I came up with was this:
1x 12mm * 2400mm * 1200mm Plywood (tray and gussets)
2x 42mm * 66mm * 1030mm DAR Pine (rails)
4x 42mm * 66mm * 1070mm DAR Pine (ends, inner supports)
4x 42mm * 66mm * 1800mm DAR Pine (uprights)
16x 70mm * 8mm stainless steel bolts and nuts (joining the ends with the rails, joining the gussets to the rails and ends)
30x 35mm * 2mm wood screws (screwing the plywood tray to the support frame, joining the gussets to the uprights)
1x bottle of AquaAdhere (for gluing the non removable joins)

A picture of the uprights, rails, end and inner supports, all cut to length.
More pictures will follow next post.

New Banner!

So the pics for the bed have gone on hold for the next few minutes so I could put my love of celtic knotwork on the web. For all to see!
The new banner for this site has been designed by me. Its based on a number of different celtic knots and was created through my wanting to learn how to draw them, learning to do so, deciding that a computer has a much steadier hand than I do, and then designing the whole thing digitally.
I have a number of different versions other than the one used in the banner but I'll only post the version most relevant to its evolution to final form. The evolution in concept was from 2 axis reflection symmetry with a tribal tattoo style towards rotation symmetry, knot styled.
Maybe one day soon I'll actually tie this knot (unlikely however).
Final form

Earlier form, with no overlaps
Edit:
I also changed to a nicer (ish) font and did some stylizing to using gradients so it would stand out.

Wednesday 29 June 2011

The Bed

OK, so I've been away for a while organising a new project.
Its got four legs, a mattress and a lot of rope.
Anyway I have already started making the various parts for this bed. It will be themed, possibly carved, and it will be a loft bed (so as to place it above a couch). I will begin uploading pictures tomorrow and continue to do so until full installation has been completed

Friday 10 June 2011

Soaking Dry

This is another track that I have created. Short, but in hindsight I'm glad that I created this track because my best friend loves it. It is titled Soaking Dry.

SoakingDry

Friday 3 June 2011

Staffmaking

This post is going to be entirely about staff making. For this I will provide some photographs along with written commentary on what is done.

Materials and tools needed.
Materials
-Metal tubing. For this I used some steel tubing however chrome plated curtain rod is cheap and readily available
- Wooden dowel (preferably hardwood). This needs to fit as closely as possible inside the tubing
- Masking tape
- Electrical or duct tape
- Phillips head wood screws about 3/4 of an inch to an inch long
- Washers to fit the screws
- Kevlar Wick. I used wick thats about 2cm wide, bought online from Home of Poi
- Bicycle inner tube.

Tools
- A phillips head screwdriver
- A drill press (I just happened to have one handy, if you don't you could use a normal drill with metal drill bits)
- A hacksaw
- A vice is helpful but not necessary
- Scissors

Method
1.
Cut your metal tubing to length. For double staffs most people say 3 feet but I think its up to personal preference, a good way to judge is by holding the tube at the middle with your arm outstretched so the tip is midway along your bicep.

2.
Drill holes in your tubing. This is where having a drill press is really handy, drilling holes in tubing is hard without one.
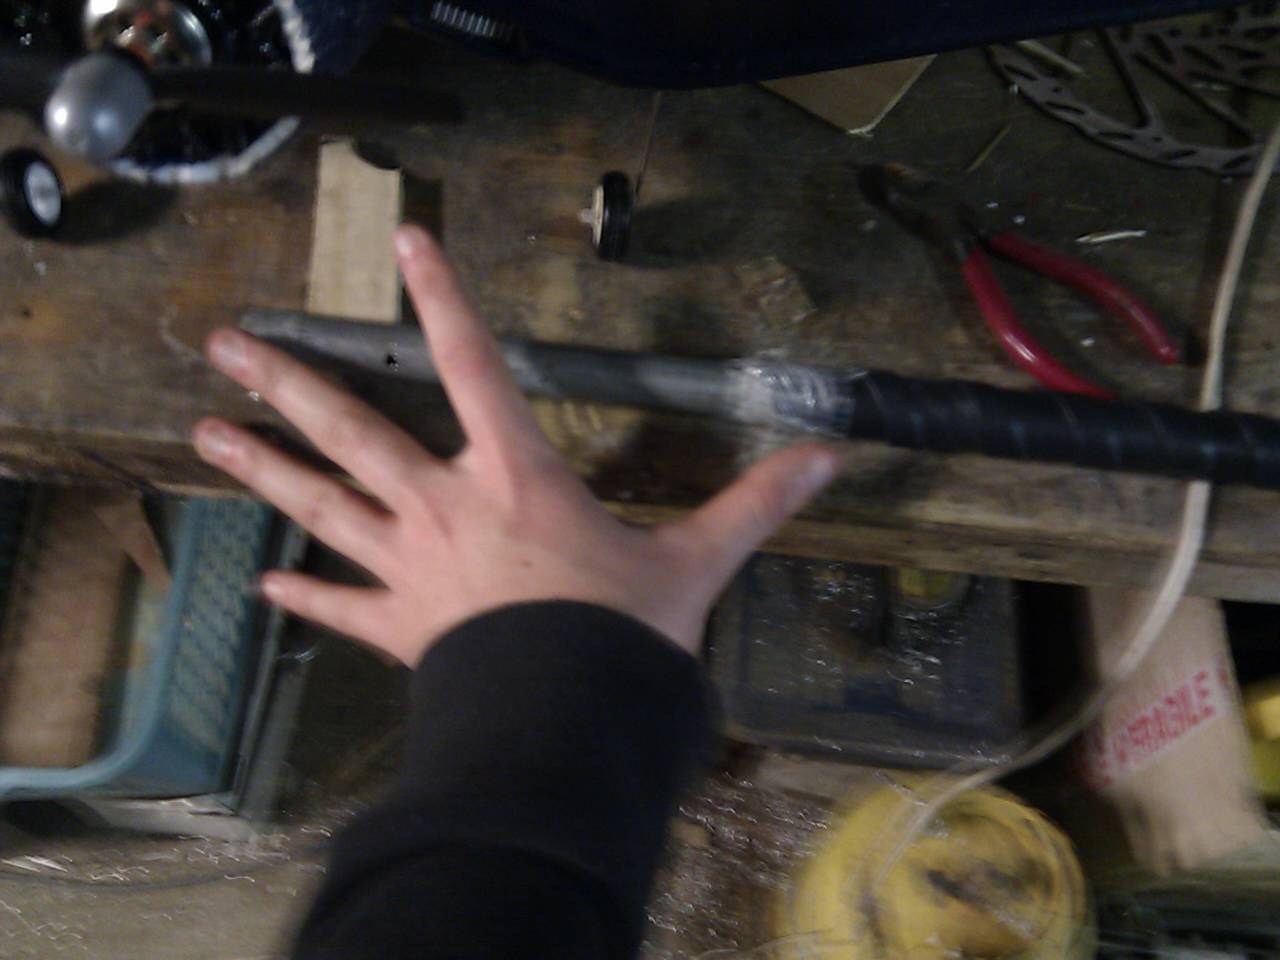
 This photo just demonstrates the distance between the holes that I've drilled. If you have wider wick than I do drill 2 holes for each side of the wick. Why I have drilled 2 holes will be revealed later.
Repeat this step for as many staffs you are making, And for both ends of course.

3. 
File the inside of the tubing. This is actually quite important. Make sure that the inside of your tubing is smooth. This is so that the dowel will easily fit inside your tubing.
4.
Gripping. Some people like to do this at the end however I find it makes wicking the staffs easier. For this tek we are going to be using a cheap, easily available, and durable grip; a bicycle inner tube. 1 inner tube makes around 2 grips.
Go out to your local bike shop and ask them if they have any busted bicycle inner tubes, they should have heaps.
Cut the inner tube like this.
Then wrap it around the tubing so it stretches over itself. You will need to pull it quite tight.
 Make sure that you start about this far from the tip. I've been told the minimum distance for it not to be burned is 13cm.

Tape the ends of the grips to keep it in place.

5.
Coring. What we are doing here is filling the inside of the tube with a dowel core that has 2 functions; it weights the tips of the staff and it gives the crews holding the wick on something to grip onto.
Cut your dowel into equal pieces (2 pieces if you are making one staff, 4 if you are making 2 staffs) making sure that the length is about half an inch longer than the distance from the tip of your staff to the second hole.
Use masking tape up the cores we have made. Try and tape it so that it just fits. If your cores are a little larger than the inside of your tubing then you will need to sand then down so that they fit. You might have to hammer them in, but if they fall through then you need to add some more tape.


6.
Wicking. This is the hardest part of this whole process.
Measure your wick by wrapping it around your tubing tight so that its about a cm thick around the tubing. Unwrap and cut it using scissors (WARNING: cutting Kevlar with scissors will blunt them) and use the piece you have already cut to make as many other identical ones as you need.
You should have a bunch like this:
 Tape them to the tip like this and wrap it round tightly.
 Continue wrapping around. Make sure that its as tight as you can.
 When you get to the end fold the tip.
 Screw through the Kevlar and into the dowel. Be sure not to lose any tension when you do this and make sure that the screw penetrates the dowel, preferably all the way through. Sometimes it misses the hole and hits the metal, there is not much you can do but try again.

 Now repeat if you are using large wicks, otherwise place a small screw through the other hole as pictured. This second screw is vital, if this screw is left out the core may fall out due to high temperatures and fall out.
Final finishing touches that you might find useful:
-Marking the center of the staff with whiteout (if you need it).
-If you have a grinder (I did) grind the tips so they are flush with the wicks, this is great and will help if you accidentally hit yourself with the hot bits.
-Shock absorbers. If you do any double contact these are a good idea. grab some of the inner tubes and slice them open. Cut strips into them and then tape them sideways around the ends of the stick.

And the finished product (x2)